Documentation
This page is dedicated to the documentation of our plugin. Here, you will find all the information you need to fully understand and make the most out of our plugin, including installation instructions, configuration settings, and usage tips. Whether you’re a first-time user or an experienced developer, this documentation will provide you with the knowledge you need to effectively use our plugin on your website.

Quick Guide: Purchase & Install Our Plugin
Purchasing our plugin is a simple process that will have you up and running in no time. Here’s what you can expect:
- Select the plugin on our website.
- Complete the checkout process and make your payment via credit card.
- Receive an email with your license key and a zip file containing the plugin.
- Log in to your WordPress dashboard and go to the “Plugins” section.
- Click “Upload Plugin” and select the zip file you received in your email.
- Once the plugin is installed, access its settings through the WooCommerce section in your WordPress dashboard.
- In the plugin settings, navigate to the “Licence” tab and enter your license key to activate your plugin.
By following these steps, you can easily and quickly purchase, install, and activate the plugin, giving you access to all its features and benefits.
Optimized Integration: Our Plugin + WPML + WooDiscount Rules
This plugin integrates with the following popular plugins for enhanced functionality:
- WPML
- WooDiscount Rules
By working hand in hand with these plugins, our plugin offers a more comprehensive solution. The integration provides additional features such as:
- Creating dynamic discounts – WooDiscount Rules
- The text displayed on the front-end can easily be translated with WPML
This results in an improved user experience and greater compatibility.

Smooth Theme Integration: Our Plugin and Top WordPress Themes
Our plugin integrates with the following popular WordPress themes for a seamless experience:
- Flatsome
- Block Shop
- Kidz
- Avada
The integration with these themes provides the following benefits:
- Effortless and smooth experience
- Versatility to customize the look of the website
- Ability to take advantage of theme specific functionalities
- Increased compatibility and consistency in design and functionality.
How to set up our plugin
- Once installed, access the plugin through the WooCommerce option in the WordPress dashboard.
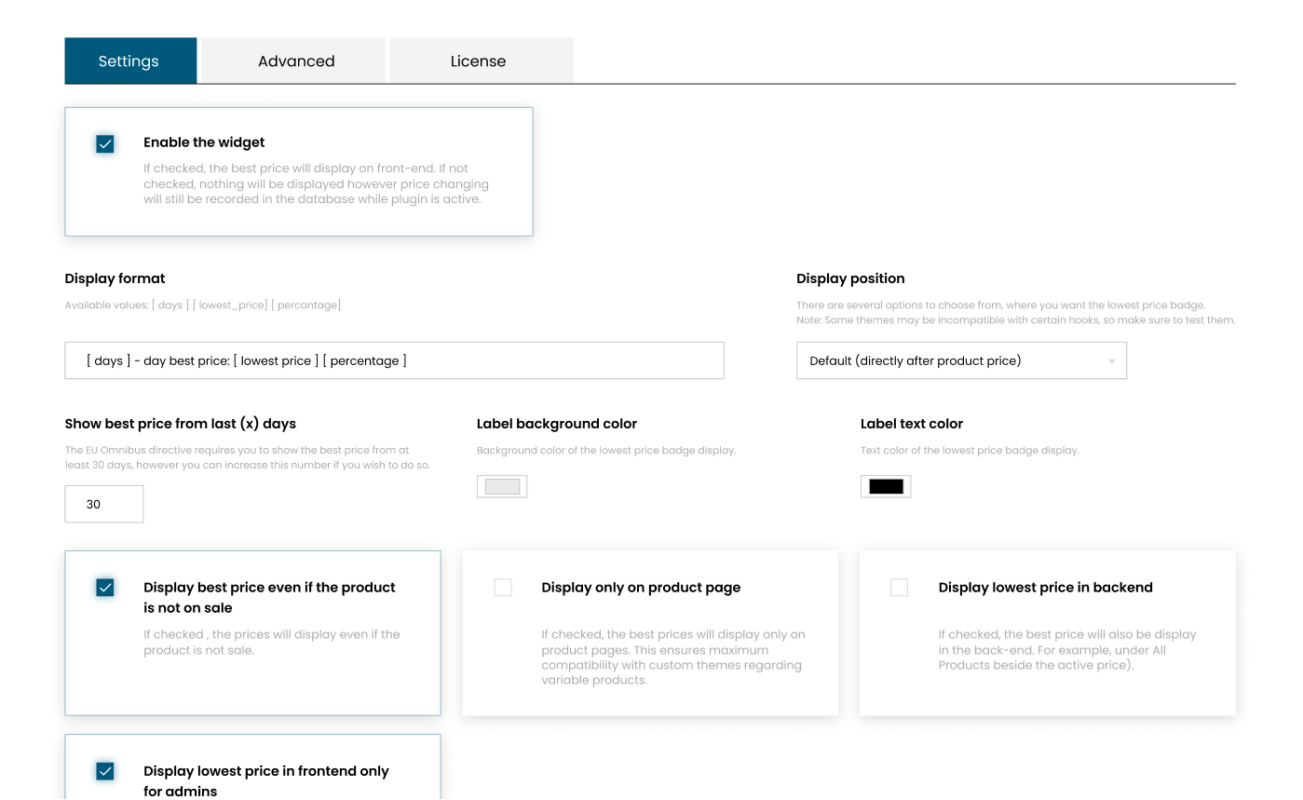
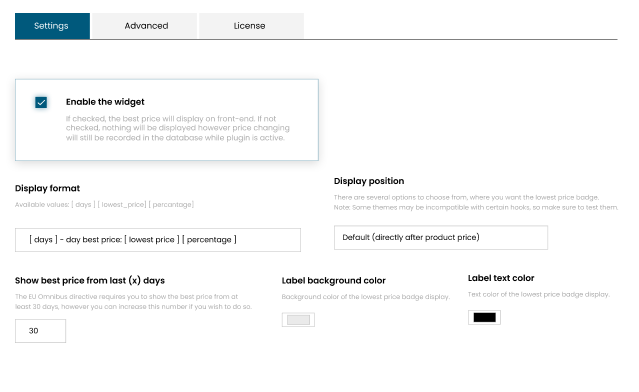
- In the plugin dashboard, navigate to the “Settings” panel where you can customize the look and functionality of the plugin.
- Enable the widget: Check this option to display the best prices on front-end, unchecking will result in no display but price changing will still be recorded in the database while plugin is active.
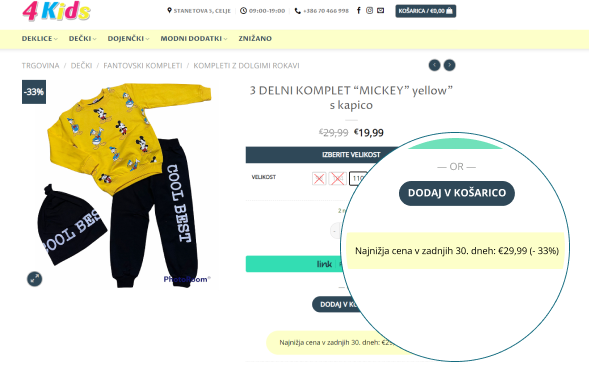
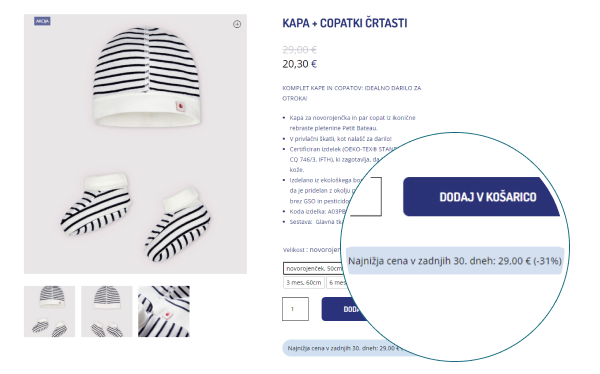
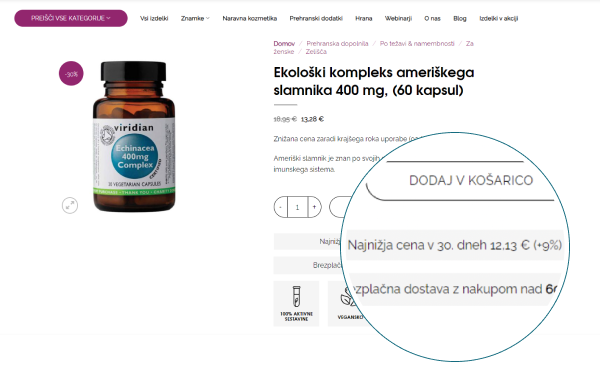
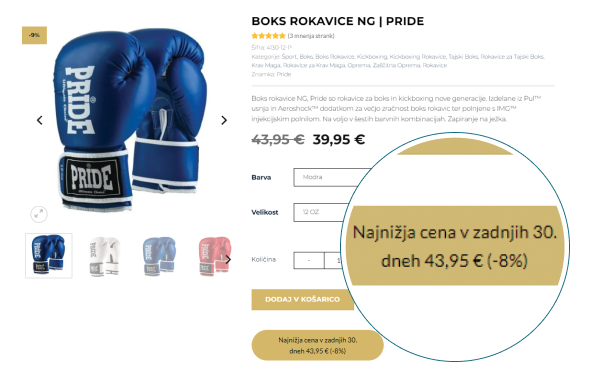
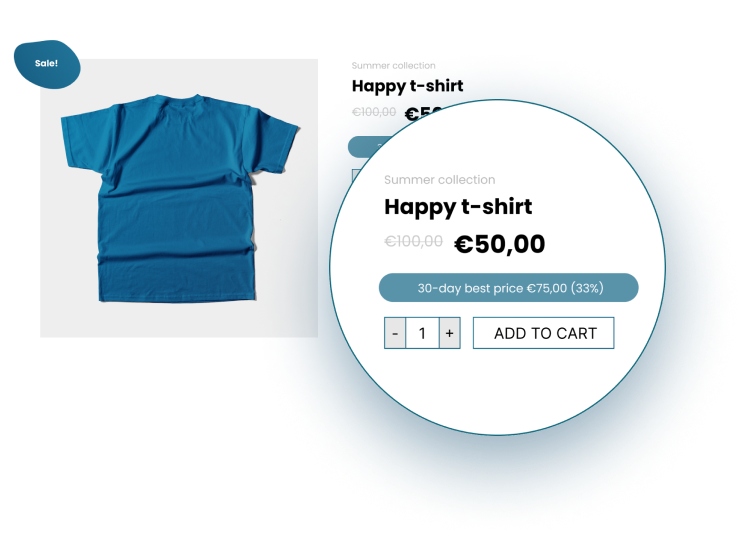
- Display format: Choose the text to display on front-end, including [days], [lowest_price], and [percentange] values.
- Display position: Select where you want to show the lowest price badge, keep in mind that some themes may be incompatible with certain hooks.
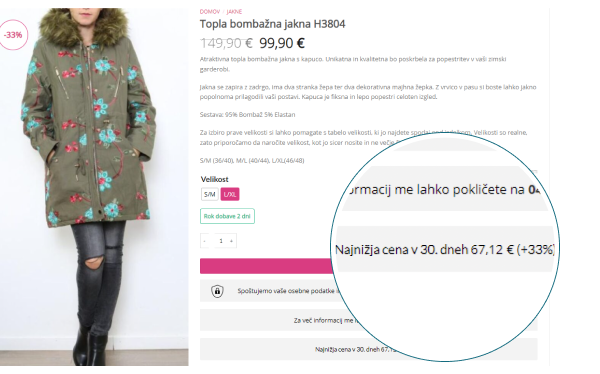
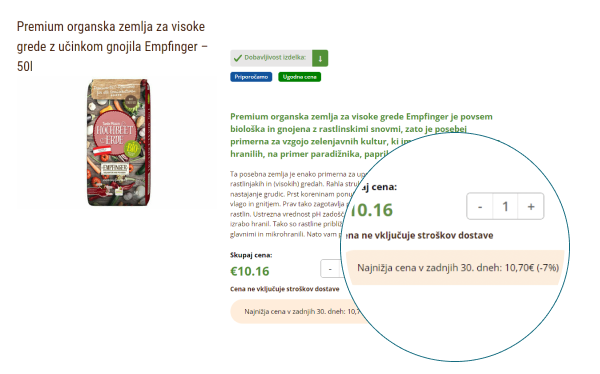
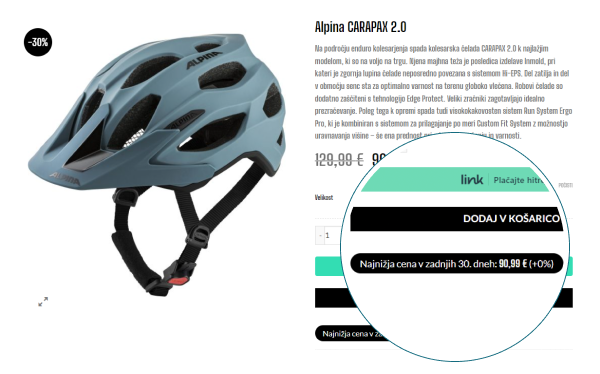
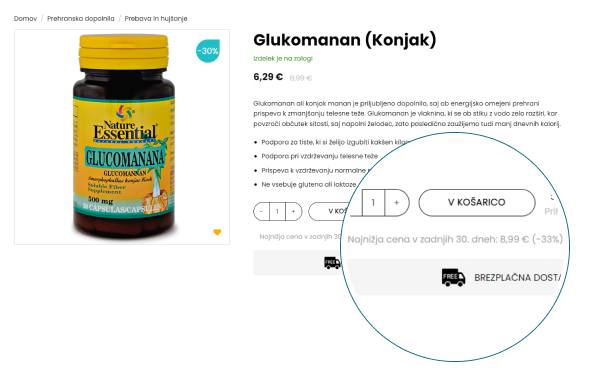
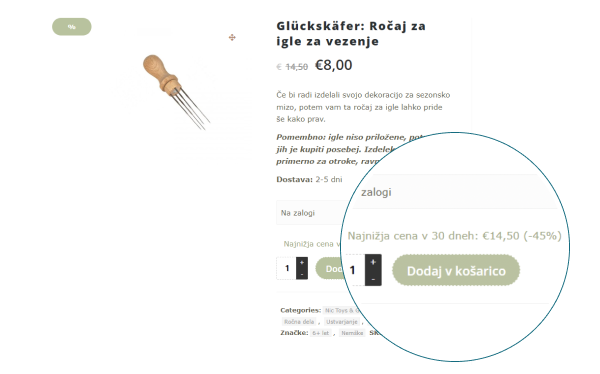
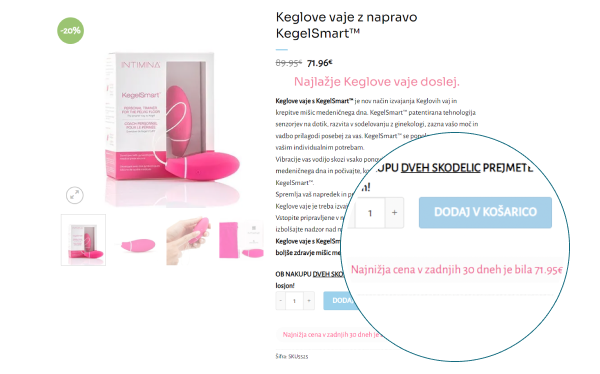
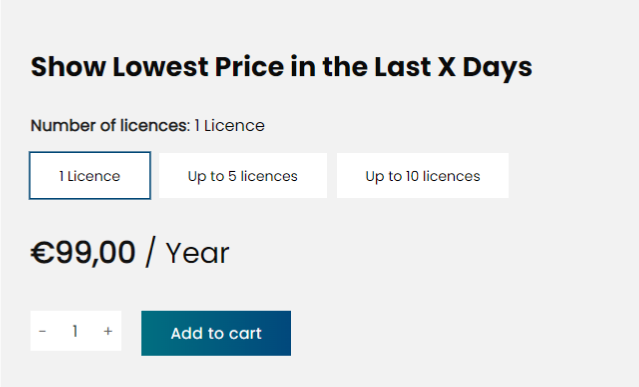
- Show best price from last (x) days: The EU Omnibus directive requires showing the best price from at least 30 days, you can increase this number if desired.
- Label background color: Set the background color of the lowest price badge display.
- Label text color: Choose the text color of the lowest price badge display.
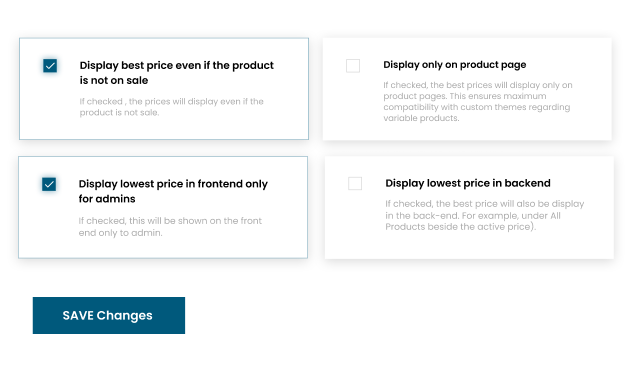
- Display best price even if the product is not on sale: Check this option to display the best price even if the product is not on sale.
- Display only on product page: Check this option to display the best price only on product pages for maximum compatibility with custom themes for variable products.
- Display lowest price in backend: Check this option to also display the best price in the backend (e.g. under All Products beside the active price).
- Display lowest price in frontend only for admins: Check this option to only display the best price for logged-in administrators on the frontend.
In addition to the various display options, the look of the plugin can also be customized using CSS. The plugin provides two CSS classes:
- woo-eu-omnibus-lowest-price-wrapper
- woo-eu-omnibus-lowest-price
You can use them to apply custom styles and further tailor the appearance of the plugin to match your website’s design.
By following these steps, you can have our plugin fully set up and customized to meet your specific needs.
How the plugin works
Our plugin works by continuously monitoring and tracking the prices of your products. Here’s how it works:
- The plugin indexes the prices of your products once a day (at the time you set), each time you save, each hour when someone visits the page.
- On the front-end, the plugin displays the lowest price of each product over the last X number of days (as specified in the plugin settings).
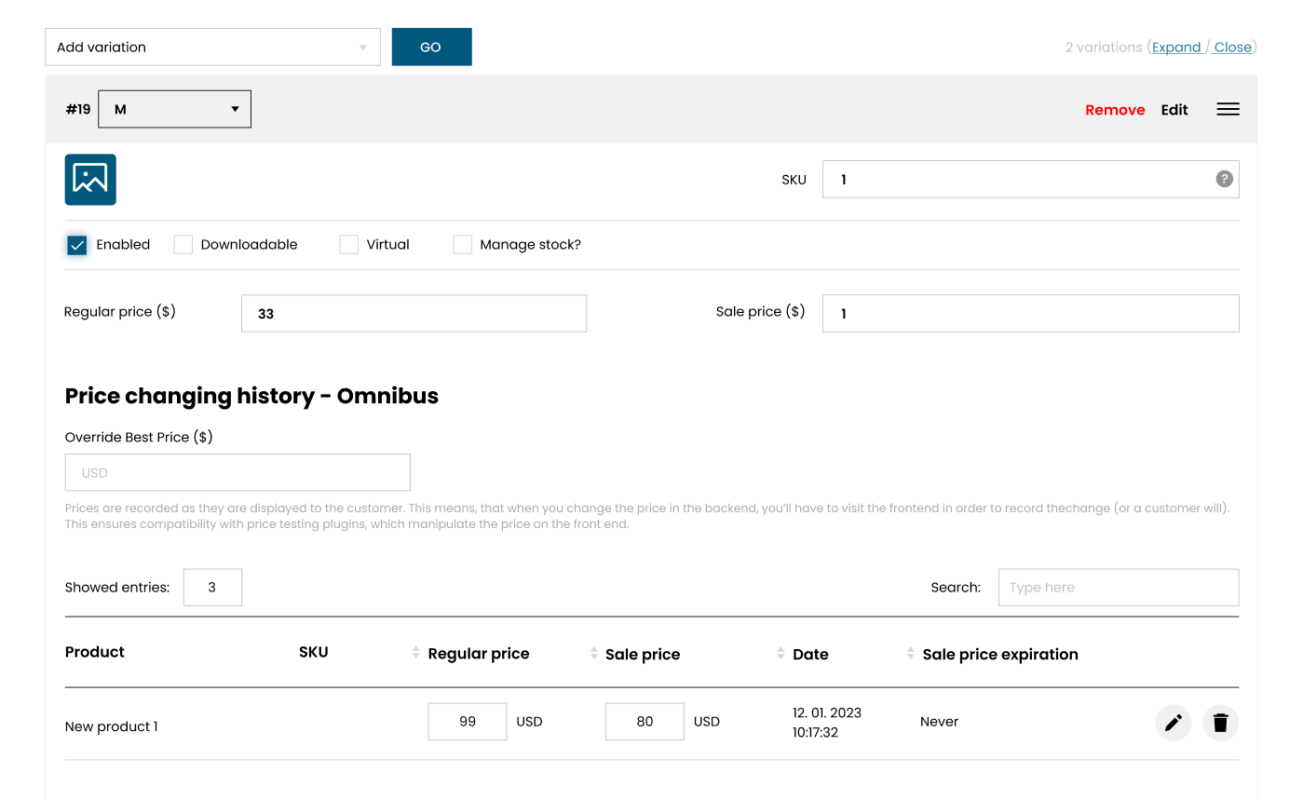
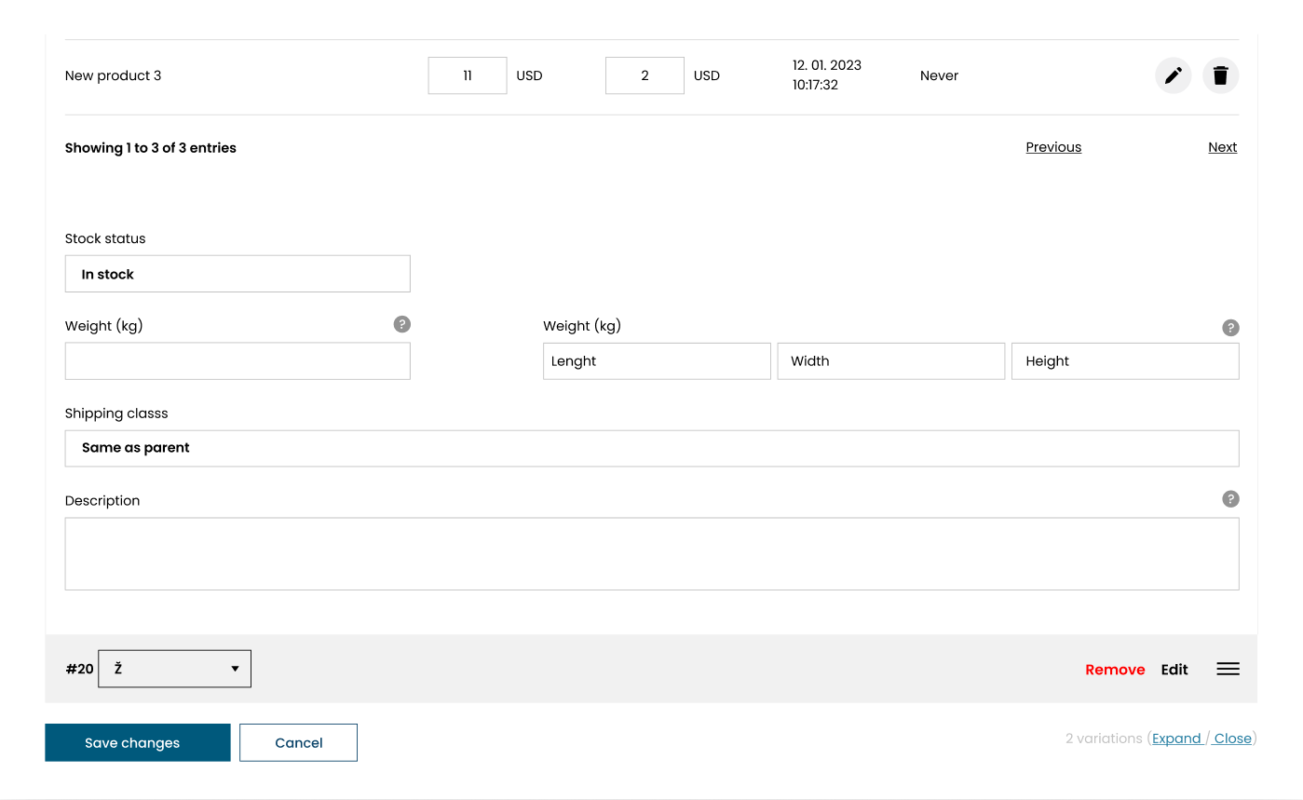
- The price history and information can also be viewed in the backend of each product page.
- By utilizing this process, our plugin provides an accurate and up-to-date representation of the lowest price of each product, helping you to stay competitive and meet the needs of your customers.
How to update our plugin
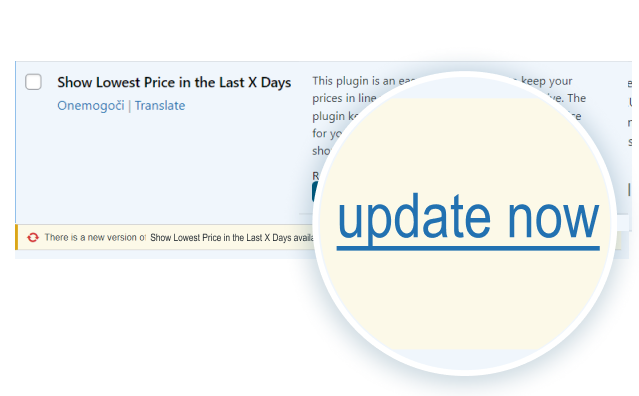
Updating our plugin is an easy process. Follow these steps:
- Log in to your WordPress dashboard.
- Locate the “Plugins” menu in the side panel and click on it.
- Find our plugin in the list of installed plugins and click on “Update” next to it.
- Wait for the update process to complete and then verify that our plugin has been successfully updated.
By following these simple steps, you can keep our plugin running smoothly and with the latest features.
SUPPORT
If you encounter any difficulties during beforementioned steps, our plugin comes with full-time lifetime support until we stop selling the plugin. You can reach out to our developers at plugins@wpm.si and we will promptly address any questions or concerns you may have.
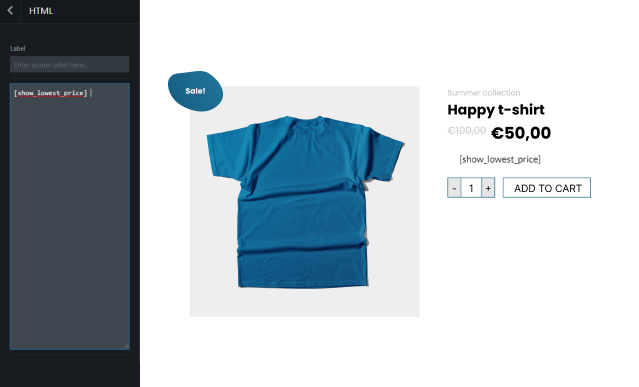
Shortcode Feature for Enhanced Customization and Flexibility with our Plugin
In addition to its integration with popular WordPress themes and plugins, our plugin also includes the option to use a shortcode, allowing for even greater customization and flexibility in your website’s setup. Simply insert the shortcode into your desired page or post, and the lowest price information will be displayed in the designated area.
Change Log
- Current version: 1.1.8
Popular websites that trust our plugin
Our plugin is designed to work seamlessly on a wide range of websites, including popular online stores such as:
Whether you’re running a small business or a large online store, our plugin can help you manage your product pricing and display the lowest price to your customers.